

Theme
In the first article of the series we learned about the concepts, terminology, technologies involved, installing Jenkins, creating ASP.NET Core application and continuous integration of Asp.Net Core application using Jenkins via two approaches i.e. pipeline approach and freestyle project approach. In the second article, we published the ASP.Net core application to Azure App Service and Configured Jenkins on Azure. In the third article of the series, we focused on Azure Active Directory and Service Principal and how to integrate Jenkins with Azure Service Principal.
In this last article of learning CI and CD of Asp.NET Core application using Jenkins, we’ll learn the CI/CD of ASP.NET Core application on Azure using Jenkins Azure Pipeline.
Roadmap
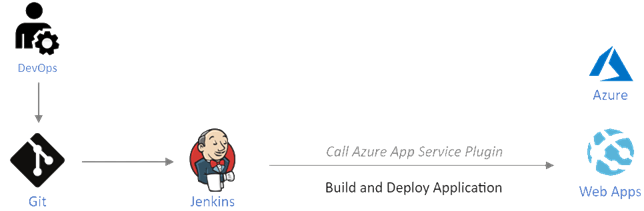
This article series will explain using Jenkins for CI and CD of an ASP.NET Core web application on the local development environment, publishing the web application to Azure Web App Service and configuring Jenkins on Azure for continuous integration and continuous deployment of the hosted application. GitHub will DevOps as a source control repository. We’ll create a pipeline using Jenkins that fetches the code from GitHub, builds the code, runs the tests and deploy the package. This will be a repetitive task on each commit to the code located on GitHub.
Following is the roadmap we would be following to completely learn end to end development and configurations of Continuous Integration and Deployment (CI/CD) of Asp.Net Core Application on Azure Web App using Jenkins.
- Day 1: Continuous Integration of ASP.NET Core application using Jenkins.
- Day 2: Publish the ASP.Net core application to Azure App Service and Configure Jenkins on Azure.
- Day 3: Integrate Jenkins with Azure Active Directory and Service Principal.
- Day 4: CI/CD of ASP.NET Core application on Azure using Jenkins Azure Pipeline.
Jenkins
Jenkins being an open-source tool for automation helps a team/developer to build and test the software code continuously. It makes easy for a developer to integrate and test the code without manual intervention. The tool could be set up to create a deployment pipeline that includes continuous integration of the code at each code commit, continuously testing the build, publishing artifacts and documents and deploying the code. Jenkins could be configured on the servers, say it be development, staging or production as per the deployment needs.
Prerequisites
Go through the first two articles of the series before starting this article.
The following are the prerequisites for the developers to have on their machines before getting started.
- Visual Studio 2017/2019.
- Dotnet 2.1 SDK installed.
- Azure Subscription Free/Paid.
- Java 1.5 or higher.
- Git account
- Git for Windows
CI/CD of ASP.NET Core application on Azure using Jenkins Azure Pipeline
This section will explain how we can enable continuous integration and deployment of our application. All the required setup has been done. We just need to configure Jenkins now to make it happen. We’ll do this by using a pipeline project approach.
Create new Pipeline Job
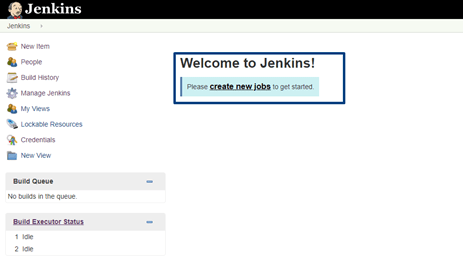
On the Jenkins home page, create a new job.
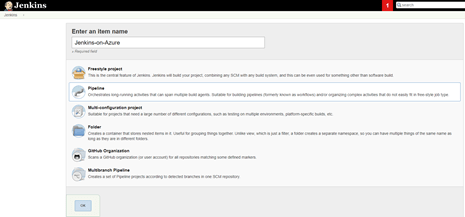
Give a meaningful name (e.g. Jenkins-on-Azure) to the pipeline project and select “Pipeline” as the project type.
Add Parameters
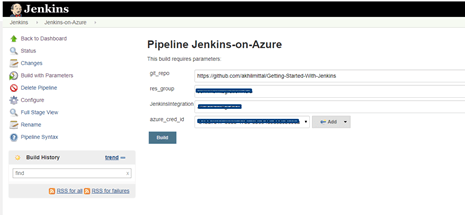
On the General tab, check the option saying, “This project is parameterized”. We’ll add a few parameters here.
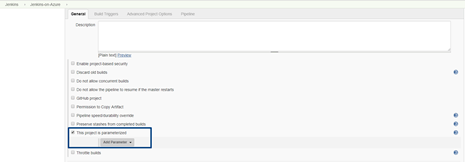
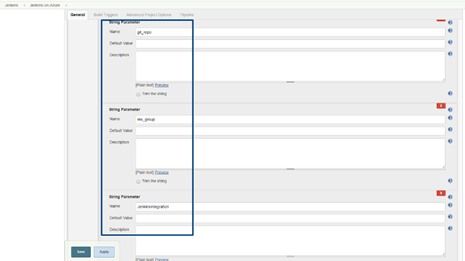
Add three string parameters named git_repo to provide URL of the git repository, res_group to provide the name of the resource group and JenkinsIntegration, this would be the name of our web application project. You can provide the default values here, or else you would be asked to provide those while running the build.
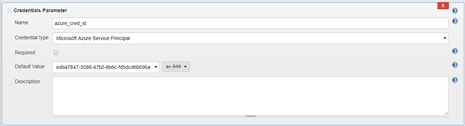
Add a credentials parameter named azure_cred_id and choose credential type as “Microsoft Azure Service Principal”, the default value will be the id service principal we created earlier.
Add Pipeline Script
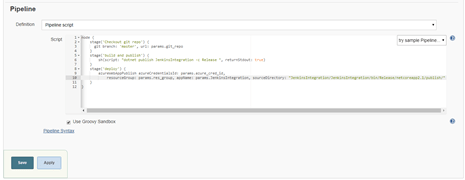
In the Pipeline script section, provide the pipeline script for git check out, build, publish and deploy.
node {
stage(‘Checkout git repo’) {
git branch: ‘master’, url: params.git_repo
}
stage(‘build and publish’) {
sh(script: “dotnet publish JenkinsIntegration -c Release “, returnStdout: true)
}
stage(‘deploy’) {
azureWebAppPublish azureCredentialsId: params.azure_cred_id,
resourceGroup: params.res_group, appName: params.JenkinsIntegration, sourceDirectory: “JenkinsIntegration/JenkinsIntegration/bin/Release/netcoreapp2.1/publish/”
}
}
Run the Build
Save the configurations and go to the home page. You can manually trigger the build and since we did not provide the default values in parameters, it asks to provide the values. Provide the values and click the “Build” button.
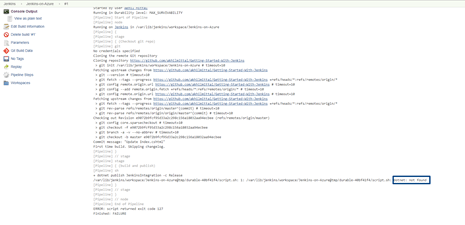
We were expecting a clean and successful build, but we see below that our build failed. The reason it says is it could not find the “dotnet” command while publishing. Since Jenkins here runs under Linux workspace. Our Linux server should have the dotnet installed.
Install Dotnet
Let’s install dotnet SDK 2.1 on Linux. Go back to the terminal where the tunnel was running and run the following commands one by one to register Microsoft key and feed.
- wget -q https://packages.microsoft.com/config/ubuntu/16.04/packages-microsoft-prod.deb -O packages-microsoft-prod.deb
- sudo dpkg -i packages-microsoft-prod.deb
Now run the following commands to install the .Net Core 2.1 SDK.
- sudo apt-get install apt-transport-https
- sudo apt-get update
- sudo apt-get install dotnet-sdk-2.1
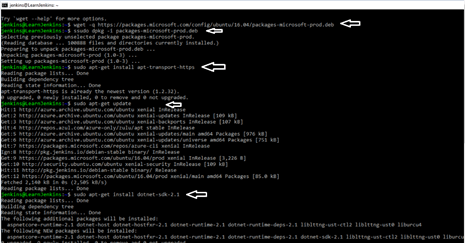
This will install the .Net Core 2.1 SDK on the Linux server.
Schedule a Build
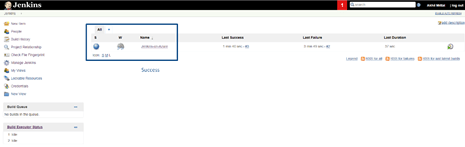
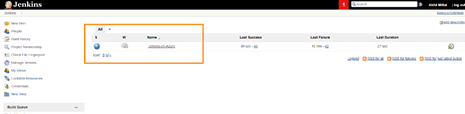
Go to the home page of Jenkins and again try to trigger the build.

We see our build succeeded.
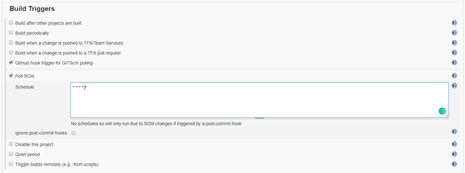
Build Automatic Polling
Let’s set the build triggers for automatic polling i.e. as soon as the code is committed in a git repository, the build should fire. Check Poll SCM and schedule value should be “* * * * *”.
Continuous Deployment
Open the browser and browse to the deployed application on Azure. We see the application running.
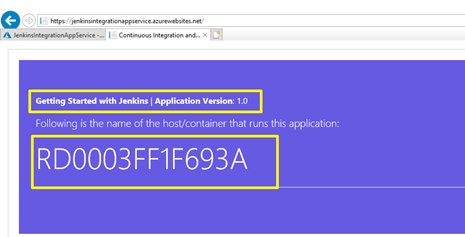
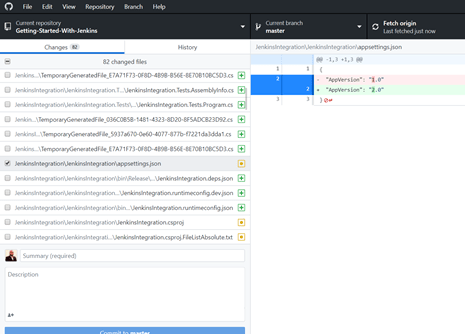
Now make some changes in the cshtml file to check if the automatic build fires. So, I changed the text from “Getting Started with Jenkins” to “Getting Started with Jenkins on Azure” in the Index.cshtml file.
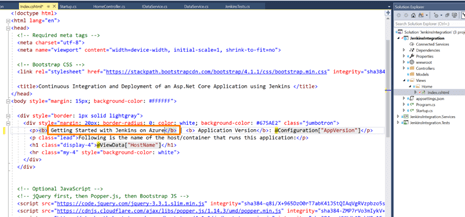
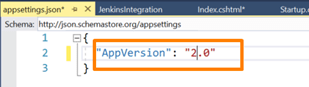
And, changed the version of the application to 2.0.
Commit the code and push to the origin.
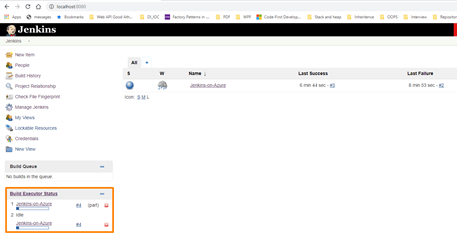
We see, as soon as the code is pushed to the repository, within one second, build automatically triggers.
Check if the build succeeds.
Go back to the browser, and refresh it, we see that our changes are reflected here that means our application automatically got deployed on Azure.

Conclusion
In this article series, we learned about the use of Jenkins and how useful it could be in our software development life cycle. We learned using Jenkins for CI and CD of an ASP.NET Core web application on the local development environment, publishing the web application to Azure Web App Service and configuring Jenkins on Azure for continuous integration and continuous deployment of the hosted application.
Jenkins is a vast topic and while working with it a lot of patience is needed for things to get set up, but once set up it works seamlessly.

3 comments