

Introduction
In the last two articles of the tutorial series, we learn about how to create a basic chatbot and how to integrate a lambda function to our bot for fulfillment. In this article, we’ll discuss what are slots and how to play around with slots to make your chatbot more interactive and richer. Let’s jump directly into the tutorial.
Series Info
Following is the four-tutorial series to learn how to develop a chatbot using Amazon Lex service and deploy the same on Facebook Messenger.
- Creating a Chatbot using Amazon Lex Service: Day 1 (Initial Bot)
- Creating a Chatbot using Amazon Lex Service: Day 2 (AWS Lambda Functions)
- Creating a Chatbot using Amazon Lex Service: Day 3 (Slots in AWS Lex)
- Creating a Chatbot using Amazon Lex Service: Day 4 (Facebook Messenger Integration)
Slots
In this section, we’ll see how to collect customer information using Slots.
- You can add a new intent to prompt a customer to speak to the representative.
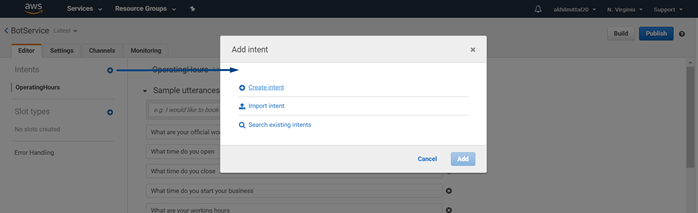
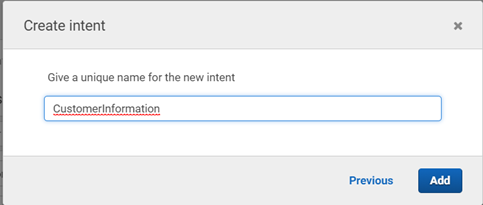
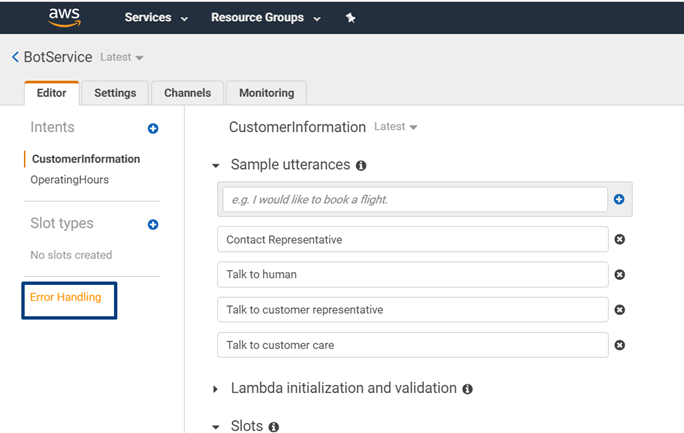
- Add the new intent and name it CustomerInformation.
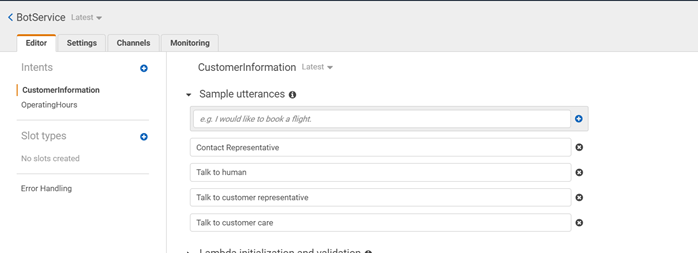
- You can provide the sample utterances like “Contact Representative”, “Talk to human” etc.
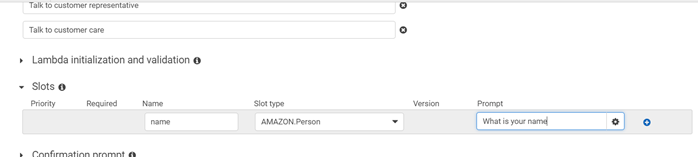
Coming down to slots section, provide the name of the slot, the type and the prompt. Lex service provides various types of slots, we’ll use those.
- Choose slot Name as name, choose slot type as AMAZON.person and prompt as “What is your name”. You can explore more on slot types by checking in the dropdown on what information you need to seek from the customer.
We’ll add few more slots like phone number, email id, preferred date of calling to the customer, preferred time of calling to the customer. Check the following picture for the implementation.
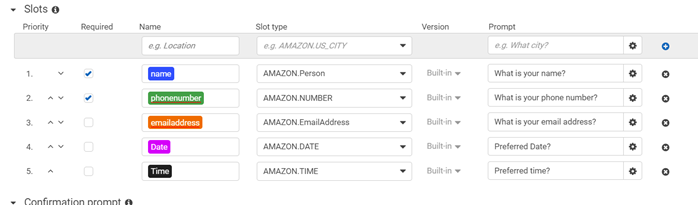
Chatbot collects all the information from the user when the user intents to speak to the customer. You can check the Required checkbox to seek all the mandatory information.
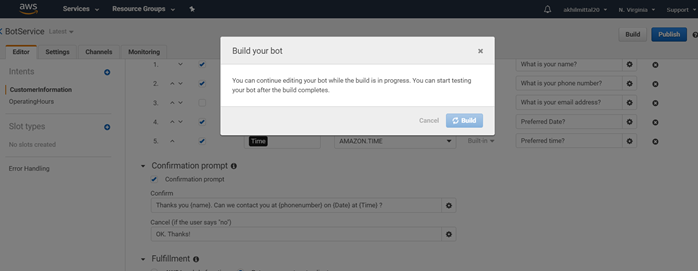
- Now add the confirmation prompt to make sure that all the information provided by the customer is correct. In the Confirmation prompt, you can reference Slot values by surrounding the Slot name with curly braces. So, we will include name, phone number, Date, and Time in our Confirmation prompt. If the user decides they don’t want us to call them and says no at the confirmation, we will just say “OK. Thanks!”.
- Now we can save, build, and test our bot.
Testing Slots
After the bot is built again. You can test the intent and the slots again to check if the bot is working fine.
So, when you type the sample utterances phrase like “Speck to a representative”, the bot starts collecting information as asked in the slot.
It asks, “What is your name?”, “What is your phone number” etc whatever was provided in the slot.
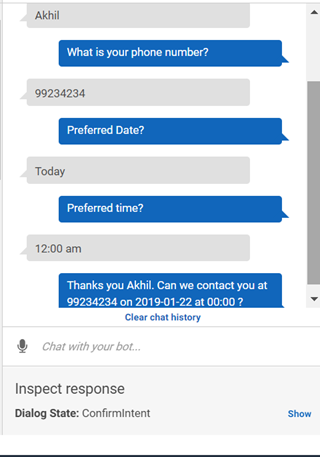
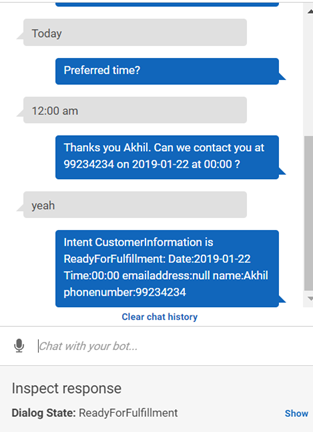
Once all the information is provided, it shows the confirmation prompt with the customer details that we provided I the prompt message for confirmation in curly braces.
Error Handling
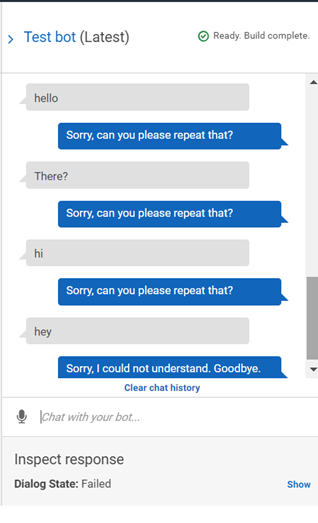
We saw that our bot does not respond well to the user saying “Hi” or “Hello” or something that is not mentioned in the intent utterances and it keeps on showing the defaulted message and after few prompts, it says that it does not understand what user is saying and goodbye. This is all configured for the bot as the default setting. We can change that as per our requirement using the Error Handling feature of Lex.
- Click on the orange color link saying Error Handling on the BotService.
- In the clarification prompt, give the prompt on what your bot is capable of so that it shows the meaningful information to the user if user types in anything that bot do not understand. You can limit the maximum number of tries as your leisure. I am limiting it to 2. After the two tries if still, the user does not ask what the bot understands then give a meaningful hang-up phrase that user can call the customer care at a particular number or something else meaningful. You can delete the defaulted clarification prompt and hang-up phrase now.

- Now test the bot and you see that when we type phrases like “hi” or something else the bot prompts for two times on what it can help with and after that shows the hang-up phrase.

Conclusion
In this article, we discussed the slots and error handling and working and integrating various kind of AWS Lex slots in the chatbot. You can make the bot richer by trying more slot options. In the next and last article of the series, we’ll learn how to deploy our chatbot in Facebook messenger and see that working live.

3 comments