

Introduction
In this tutorial series, we’ll discuss how to create a real-time chatbot using Amazon Lex service and deploy the bot over Facebook messenger. The reader of the tutorial series does not need to have prior knowledge of bot creation as the article will demonstrate the bot creation and deployment step by step using explanatory pictures. Trust me, it is fun and exciting to create your own bot and see it working over the thought of creating a bot. We’ll setup AWS account to leverage Lex Services and Facebook developers account to deploy the bot on your own Facebook page and see it working. Let’s jump directly into the tutorial.
Series Info
Following is the four-tutorial series to learn how to develop a chatbot using Amazon Lex service and deploy the same on Facebook Messenger.
- Creating a Chatbot using Amazon Lex Service: Day 1 (Initial Bot)
- Creating a Chatbot using Amazon Lex Service: Day 2 (AWS Lambda Functions)
- Creating a Chatbot using Amazon Lex Service: Day 3 (Slots in AWS Lex)
- Creating a Chatbot using Amazon Lex Service: Day 4 (Facebook Messenger Integration)
Setup AWS account
- Go to aws.amazon.com and sign in using your email address if you have an account or create a new account.

- Provide the relevant details like email address and password while creating a new account.

- On the next step, you can choose to create a Personal type account and provide needed information there.

- Next page is the payment information page where you need to provide the payment mode and its details. Nothing to worry about as when you enter your card details it deducts a minimal amount i.e. 2 INR which would be reverted to the account after successful verification of the card.
“With Amazon Lex, you pay only for what you use. You are charged based on the number of text or voice requests processed by your bot, at $0.004 per voice request, and $.00075 per text request. For example, the cost for 1,000 speech requests would be $4.00, and 1,000 text requests would cost $0.75. Your usage is measured in “requests processed”, which are added up at the end of the month to generate your monthly charges.
You can try Amazon Lex for free. From the date you get started with Amazon Lex, you can process up to 10,000 text requests and 5,000 speech requests per month for free for the first year.” Read more about Lex pricing here.

- Once successfully entered the console. Choose the region US East (N. Virginia).

Create Bot using Amazon Lex
After setting up the AWS account, it is time to create the bot using Lex service. Let’s get familiar with the terminology before we start.
A bot is a top-level component that that is deployed. It is a kind of container. The bot that we’ll develop will have one or more intents. Each one of it represents a different topic that a bot can understand and perform an action to fulfill it.
A Slot is something that we define to get the kind of information we need from the bot user to fulfill the intent.
A Lambda function is simply a place to execute your code that doesn’t require you to provision or manage a server, or serverless. Lambda supports multiple programming languages and is how you integrate your bot with other systems. Your AWS account includes 1 million free requests per month and up to 3. 2 million seconds of total execution time. Please visit the AWS Lambda pricing page for more details.
- In the console, search for the service type Lex as shown in the following image.

- You’ll be shown the Amazon Lex landing page. Click on Get Started to start creating the bot.

- We can try the existing bot samples and can create our own as well. Since we are creating a bot from scratch, choose the option of the Custom bot and give it a name.

Provide details like bot name. For output voice, choose None as this will only be a text-based bot. Set the timeout to 5 minutes. The IAM role is created for us, so there is no action needed on this line. For COPPA we can choose No.

- Once done, you’ll see the BotService page. Now it’s time to create the intent as the bot is only just a container and it needs intents. Click on create an intent button to create a new intent.

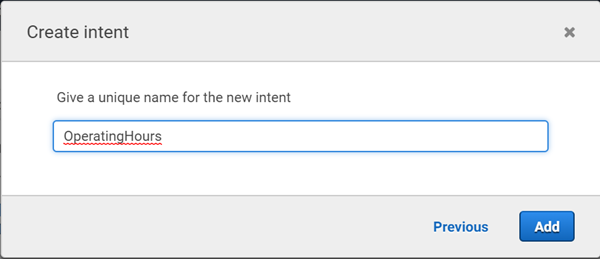
- On the popup, it shows the option to search for existing intents, create new or import an intent. We’ll select Create intent option to create a new intent.

- Give a unique name to the intent. In our case, it is “OperatingHours”. The purpose of this intent to tell the user about the operating business hours of the company for which the user is seeking information. For e.g. when you reach out to a company’s contact us via chat section, the bot welcomes you and if the user asks, “what your working hours are?” then the bot should respond with the company’s working hours and tell that to the user.
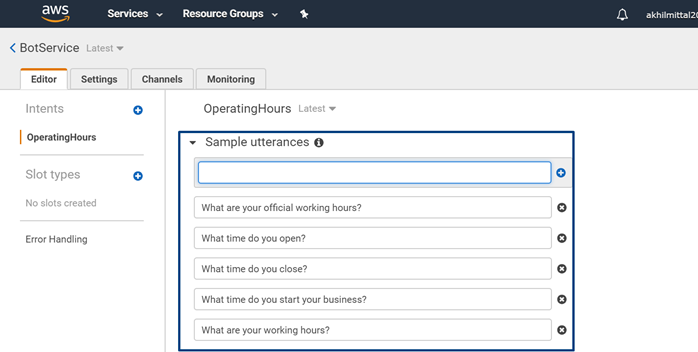
- Adding intent needs some more actions to be performed. For e.g. Sample utterances i.e. the kind of questions a user can ask to bot for e.g. “what are your working hours?”, “what time do you open?”, “what time do you close?” etc. Note that we do not have to provide all possible examples. The built-in language model will recognize similar phrases. Next is Lambda initialization and validation. This is where we can link to the code in an AWS Lambda function to validate the user inputs if we are collecting information as part of the intent. Slots are how we collect data from the user to pass into validation or fulfillment. For this intent, we don’t need any specific data from the user so we will not define any Slots.

- Provide some sample utterances as shown in the following picture.
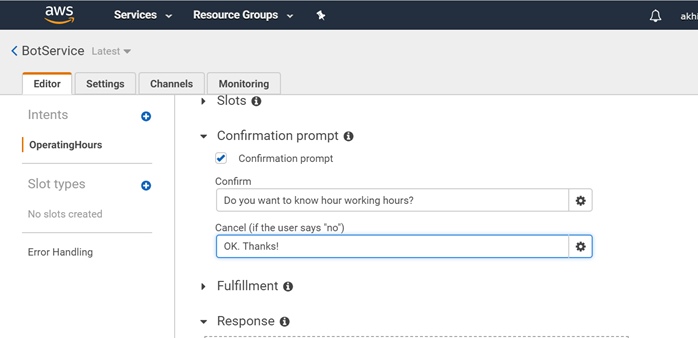
- A confirmation prompt is for double checking with the user that we have everything understood correct from the user before the bit fulfills the intent. So, enable Confirmation prompt to see how it works. Since we didn’t collect any data from the user, ask a simple question. If the user says yes, they move onto fulfillment. If they say no, then the message we put in this Cancel box will display, and the user will exit the intent.
- Finally, fulfillment is how the bot performs the result action. Typically, this is done by calling an AWS Lambda function to execute the appropriate business logic. There is also an option to return the parameters to the client. For now, you can choose that option as there is no lambda function for our bot.
- Now, build the bot via Build the bot via Build option as shown in the following image.

3. Once you click built, you’ll be prompted with a message to continue testing your bot while it is building. Click on Build.

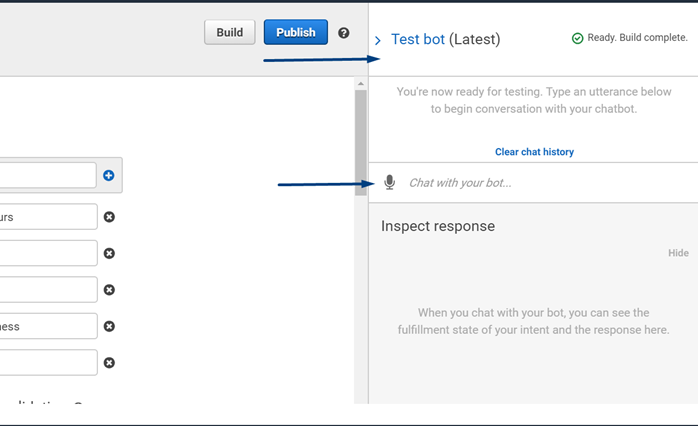
4. After a successful build, the prompt will be shown as shown in the following picture.

Test the Bot
Our first version of Bot is created now, and we can test it.
- At the right side of the page, you can see the option to test the latest bot. Start typing in now.
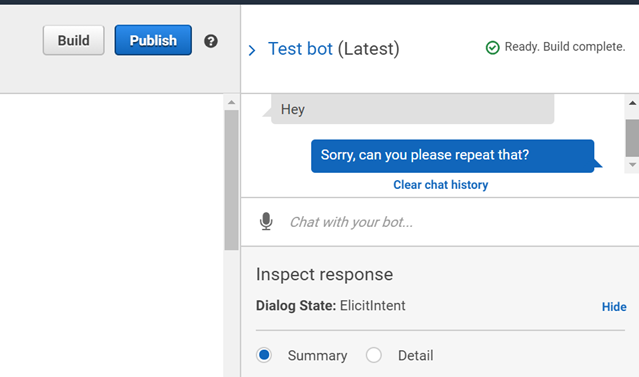
- If you type anything other than the utterances defined in the intent, the bit doesn’t recognize that and gives a defined response as shown below.
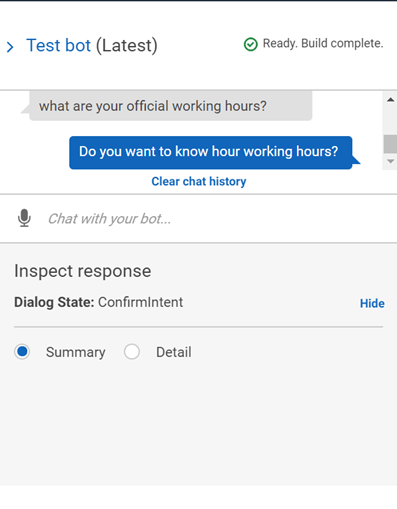
- Ask your bot a question defined in utterances, for e.g. “what are your official working hours?” and it replies with the confirmation message that we provided in the intent.
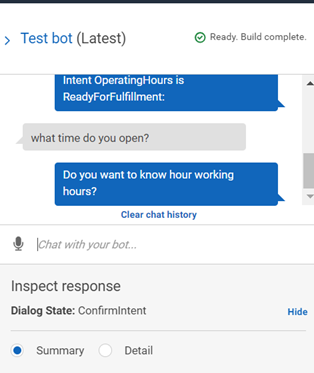
Once you say, yes, it navigates to fulfilling the intent, but since we did not provide any lambda it says it is ready to fulfillment.

- Again, ask for the relevant question.
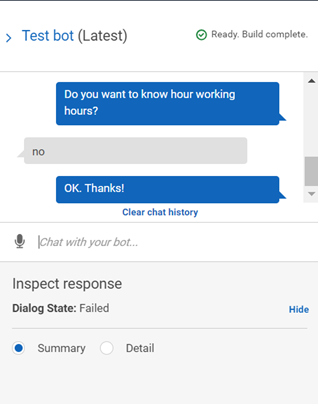
- Now type no and we’ll see that the bot responds with OK, Thanks! i.e. the text we provided in the confirmation for no.
Conclusion
In this article, we learned what chatbot is, how to set up the AWS account to get started and create and test simple chatbot using Amazon Lex service. In the next article we’ll discuss AWS Lambda functions and further will continue with slots, error handling and deployment over Facebook Messenger.

3 comments