
Introduction:
In first part of the tutorial series we got a glimpse of MVC. In this part we’ll focus on practical implementation of MVC Pattern. I don’t need to explain about theory of MVC as we have already covered this in previous part of the article.
Our Roadmap:
We stick our agenda as follows,
-
- Part1: Introduction to MVCarchitecture and Separation of Concerns.VCarchitecture and Separation of Concerns.
- Part 2: Creating MVC Application fromscratch and connecting it with database using LINQ to SQL.
- Part 3: Connecting the MVC Application with the help of EntityFramework DB-First approach.
- Part 4: Connecting the MVC Application with the help of EntityFramework Code-First approach.
- Part 5: Implementing Repository Pattern in MVC Application with EntityFramework.
- Part 6: Implementing a generic Repository Pattern and Unit Of Work pattern in MVC Application with EntityFramework.
Topics to be covered:
1. Creating MVC project from scratch.
2. Adding Controllers, Views and Models.
3. Creating sample database and use LINQ to SQL for communication.
4. Perform CRUD operations in MVC application using LINQ to SQL.
5. Understand ViewData, ViewBag and TempData.
6. Model Validation by System.Component.DataAnnotation.
1. Creating MVC project:
Step1: Open Visual Studio 2010/2013,I am using 2010.Goto File=>New=>Project and select ASP.Net MVC3 Web Application, as shown below,


Name the application as LearningMVC.
Step2: A project template selection window will be opened, select Empty in that.Select View Engine as Razor and press OK.

Step3: Now our solution is ready with an empty MVC application,

We can clearly see that the solution contains some extra folders in comparison to traditional Asp.Net web application.
We got Models, Views and Controllers folder and a Shared folder in Views folder. The folders as name denotes are used to hold the respective MVC players model-view-controllers, the shared folder in Views contains the _Layout.cshtml, that can be used as the master page for the views which we create.
We see the global.asax file that contains a default routing table, that defines the route to be followed when request comes, it says that when request comes to Home controller, the Index action of that Home Controller has to be called,

Actions are the methods defined in Controllers, that can be called defining a route, the Action methods can also contain parameters, in above mentioned figure, it says that Home controller has an Action Index which contains an optional parameter id.
When we run our application, we get something as shown below,

It says that the resource which we are looking for can not be found.The request by default follows the default route as mentioned in global.asax, i.e. go to controller Home and invoke method Index.Since we don’t have any of these yet, the browser shows this error.
Never mind, lets make the browser happy.
2. Adding Controllers ,View and Models:
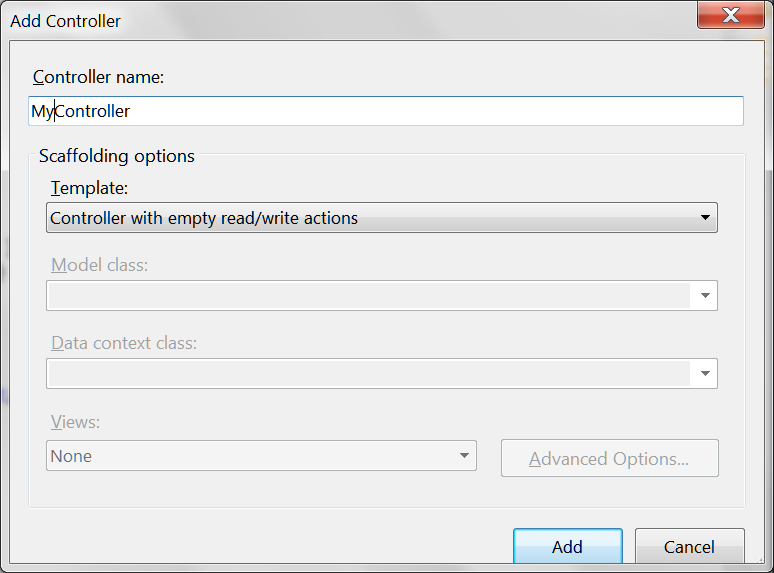
Step1: Create a My Controller by right clicking on Controllers folder and add a controller named My, add the controller with empty read/write actions, it will give us a class with few default generated actions.

Note that there are two Actions for every Action name, one is for Get i.e. when view loads for first time, and second one is for POST, when View is submitted with some data.
Change global.asax RegisterRoutes method as,
public static void RegisterRoutes(RouteCollectionroutes)
{
routes.IgnoreRoute(“{resource}.axd/{*pathInfo}”);
routes.MapRoute(
“Default”, // Route name
“{controller}/{action}/{id}”, // URL with parameters
new { controller = “My”, action = “Index”, id = UrlParameter.Optional } // Parameter defaults
);
}
Note: we have changed the name of controller as per our added controller.
Step2: We can see that we have Actions but they return a View, so we need to create Views for them.But before this we’ll create a Model named User for our Views.Right click on Model folder add a class named User,

Add following properties to User class,

Now our model is created and we can create Views bound to this particular model.
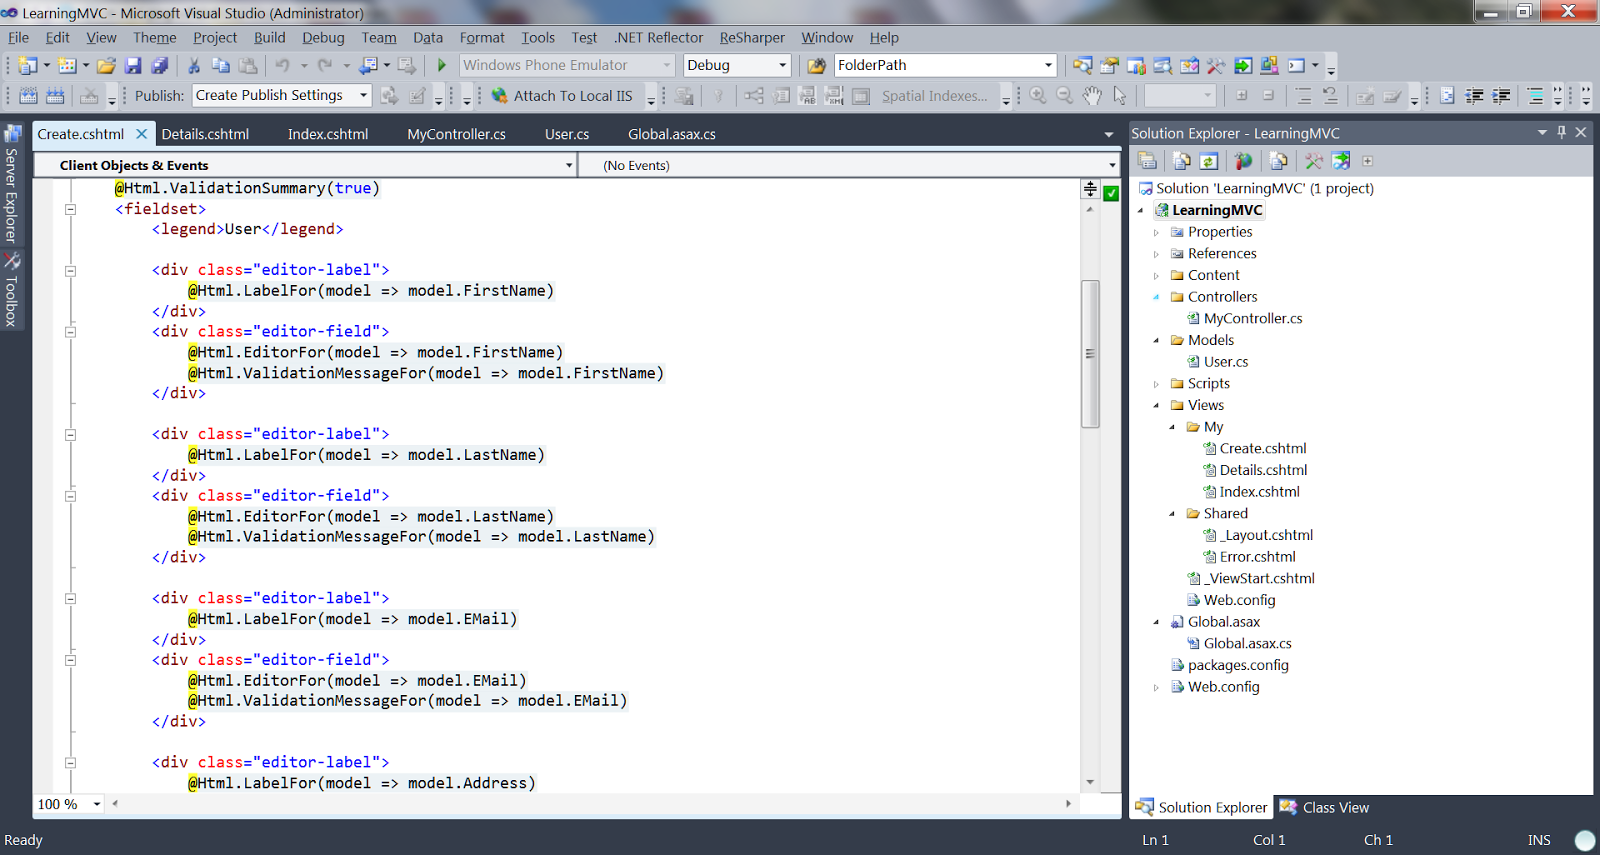
Step3: Go to controller, right click on empty Actions of the controller and from the context menu select AddView on the top.By default the View name is same as of Actions name.
e.g. For Details,

Select Viewname as Details,Model class as User, and Scaffold Template as Details.This template specifies the role of the View, that this view will show the details of the User(entity).Click add.
Likewise perform this operation for all the Actions, and create Views.
Note that Views are automatically added, to Views folder under My folder(auto created as per Controller’s name).This is to maintain a particular structure for MVC, so that we don’t have to take overhead to maintain it.


Now we have controller as well as Views, so if we run the application we get,

 i.e. Index Action of our My controller is Fired that returned Index View.
 3. Creating sample database and use LINQ to SQL for communication.
Our MVC application is ready but, rather than displaying dummy data, I would go for running the application talking to a data base so that we can cover wider aspect of the application.
Step1: Create a database, script is given in the attachment, just execute it over Sql Server 2005/2008.
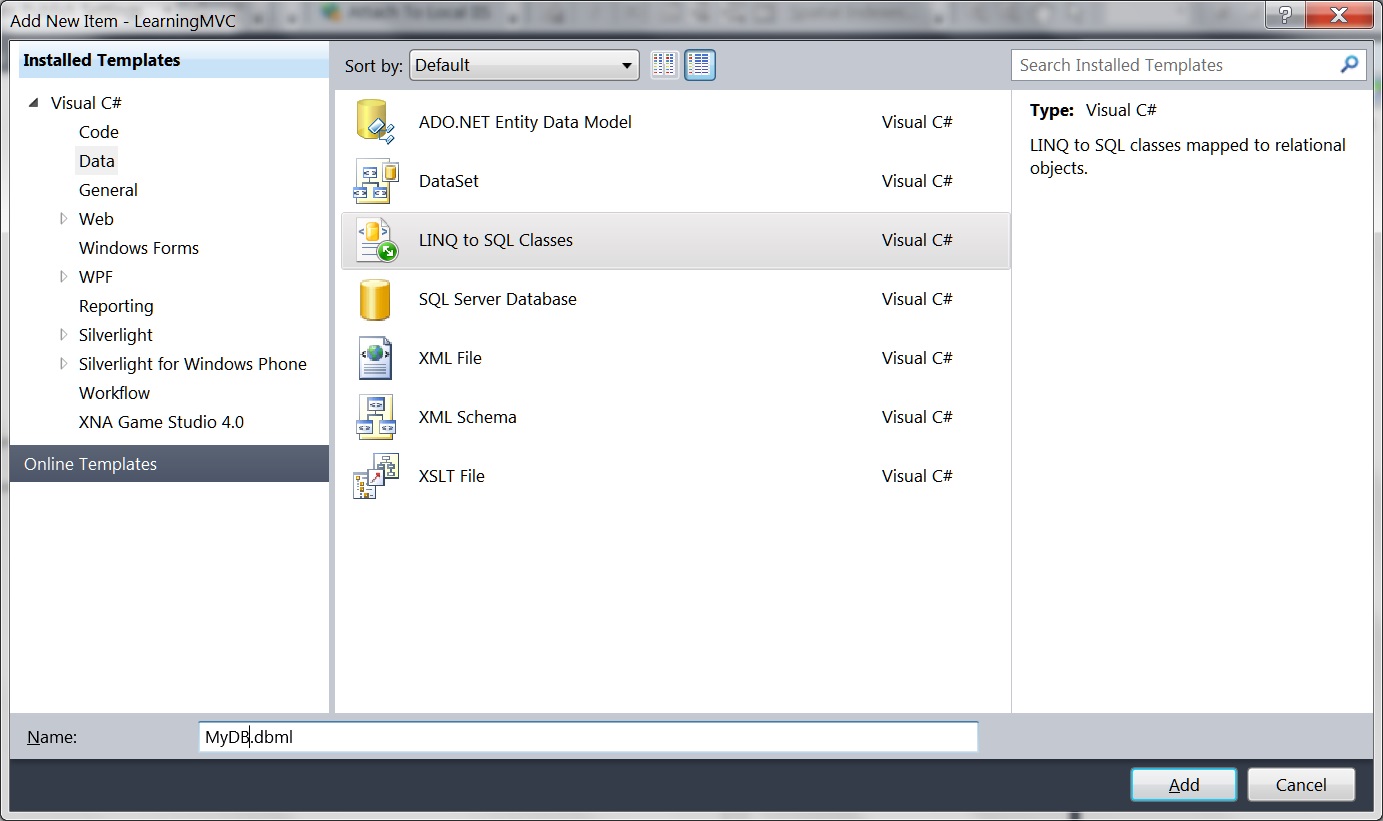
Step2: Add new Item to the solution, and select LINQ to SQL class, call it MyDB.dbml
Our Solution looks like,

Step3:Open Server explorer of Visual Studio, Open a connection, by providing Server name and existing database name in Server Explorer Open Connection window,

Click OK.Our solution looks like,
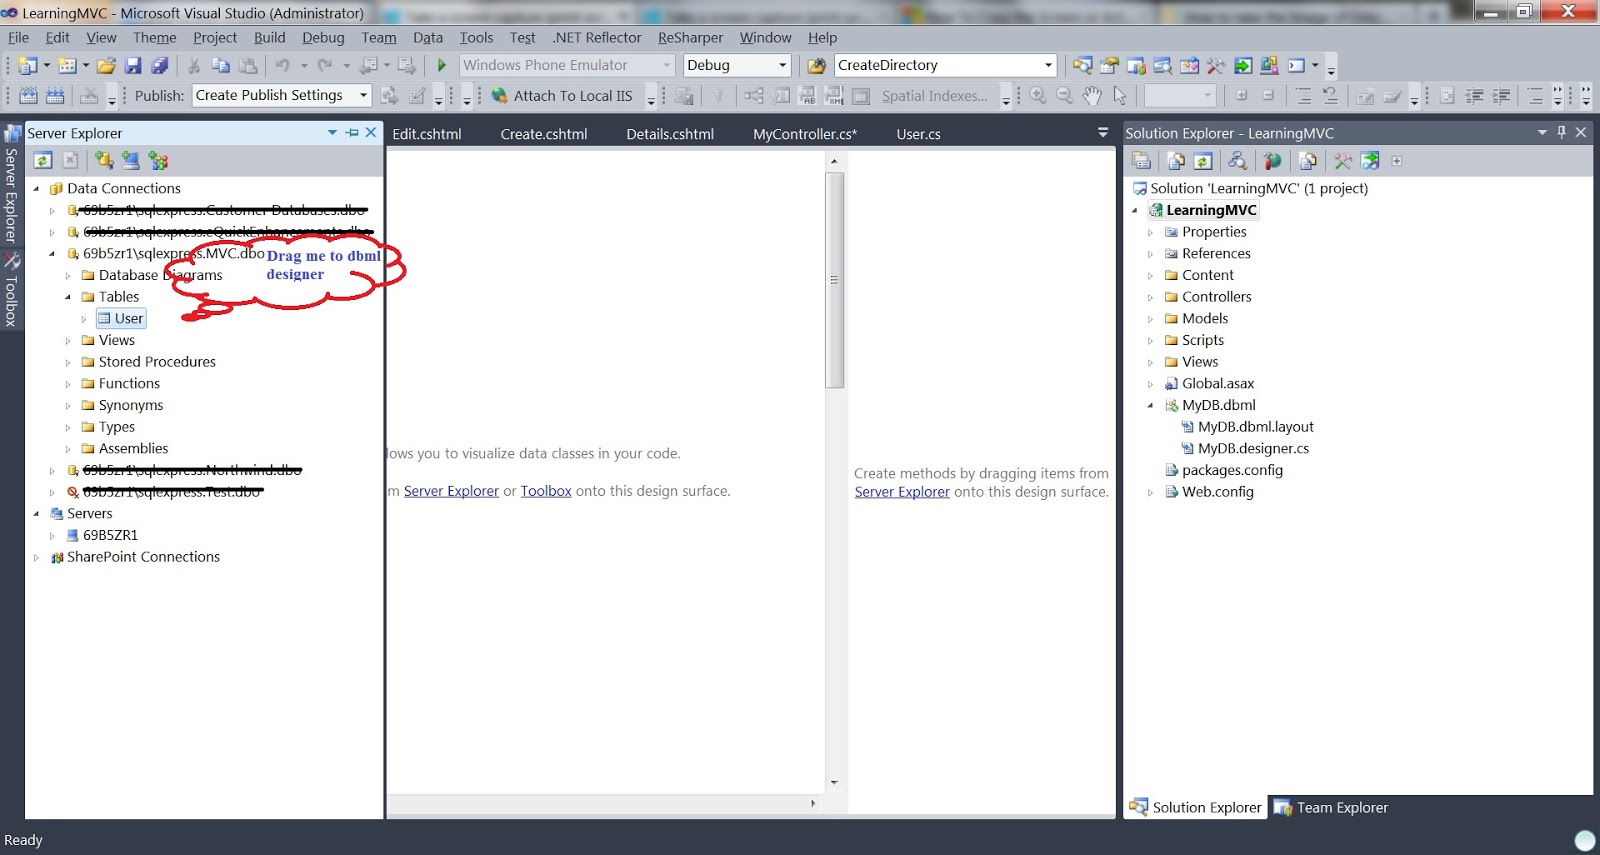
Step4: Drag the User table to dbml designer window,we get the table in class diagram format in designer window,
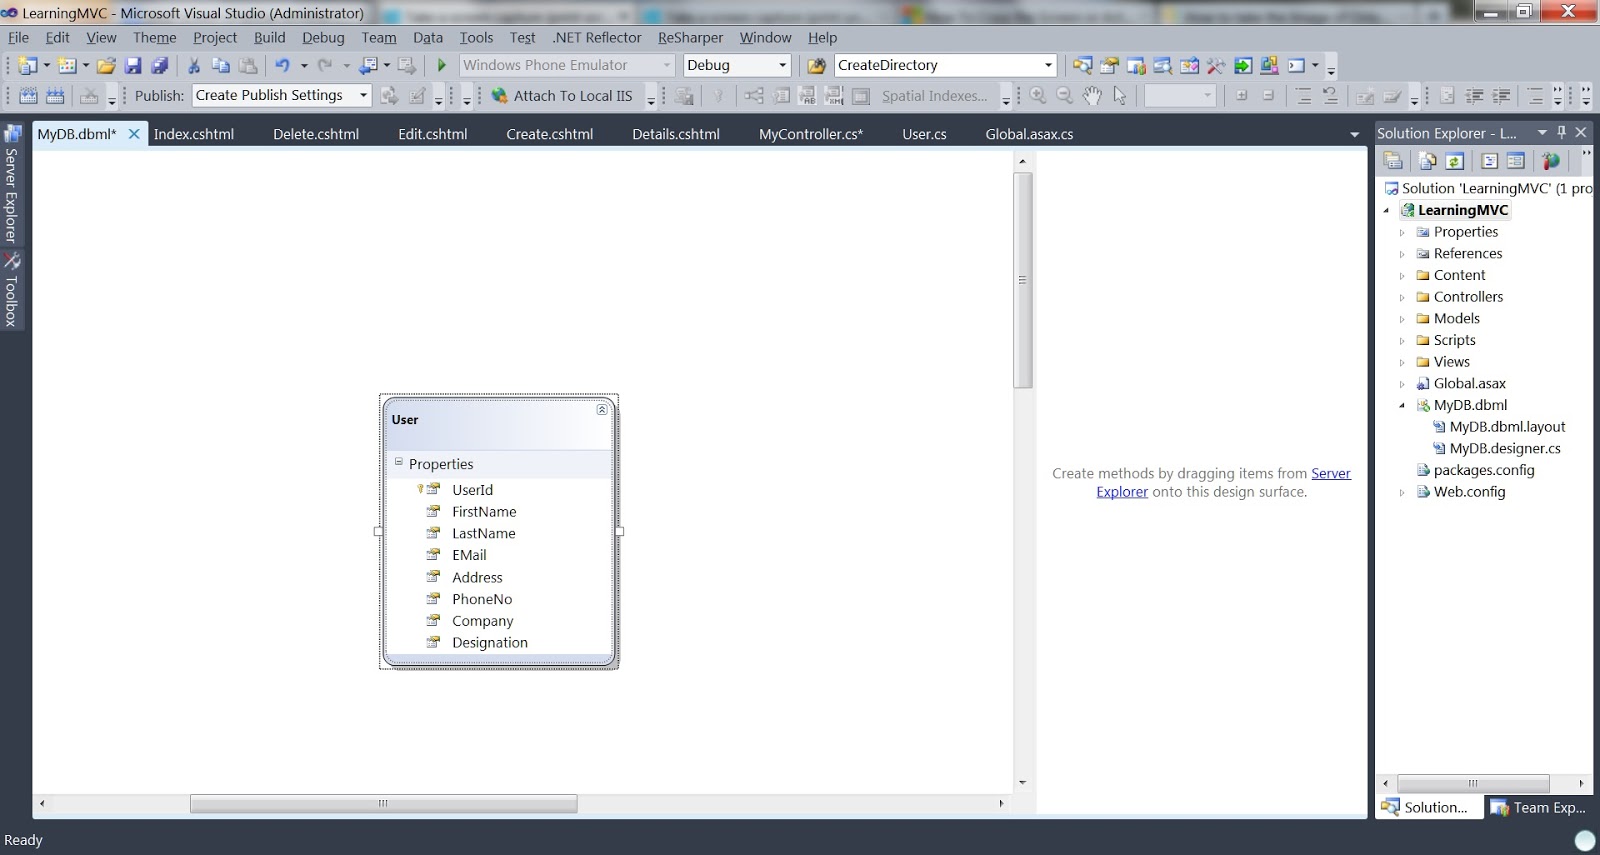
When we open MyDB.designer.cs, we get MyDBDataContext class.This class holds databse User table information in the form of Class and Properties.For every column of the table, properties are created in the class, and we can use these properties to get/set values from/in database.
4. Perform CRUD operations in MVC application using LINQ to SQL.
We now have a database, a context class to talk to data base and a MVC application to perform CRUD operations in database using the context class.
Step1 Read :
i) Go to Index Action, make an instance of context class, We can get all the table and column names in that context’s instance.
ii) Make a query to display all the records on Index view.
iii) Populate the User Model that we created earlier, and pass it to the Index view(Index View will be of List type Item template)


When we run the application, we get empty list, i.e. we don’t have records in database,

Step2 Create:
i)First write code for creating a user, for the first time for Get Action of create, always an empty view will be returned.

ii)When we post some data on click of submit of Create, then we need to make a data entry in table for creating a new user.
iii)When form posted, it fires Post Action of Create with the already bound User model properties to view fields, we’ll retrieve these model properties and make an instance of context class populate context User and submit to data base.

iv)Redirect action to Index, and now a record will be shown on the Index View.We successfully created a user J.

v) In database :

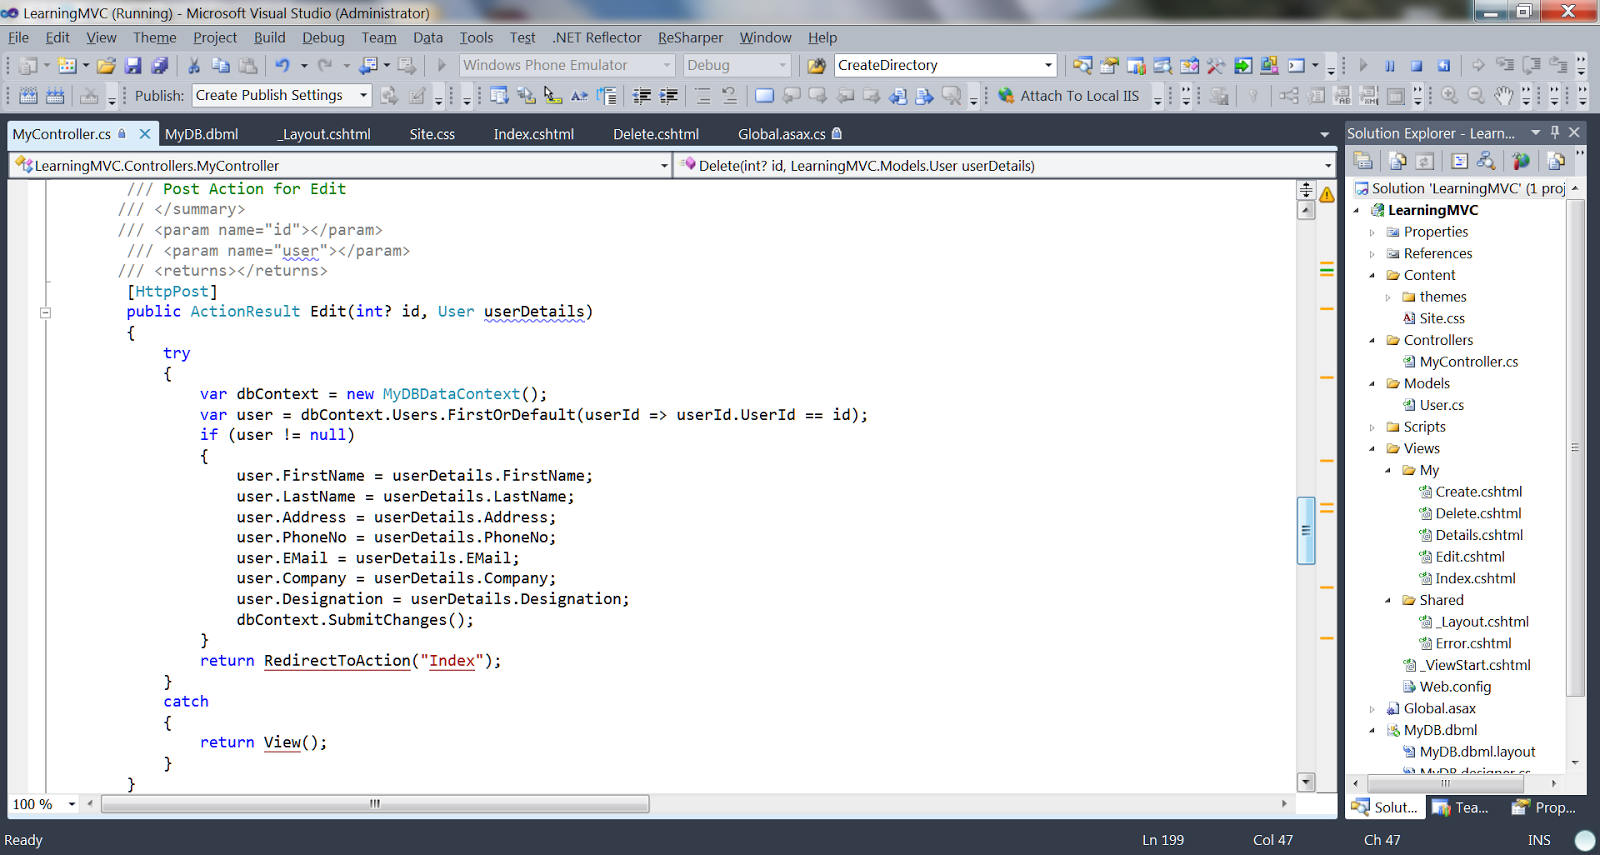
Step3 Update & Step4 Delete:
Now we are smart enough to perform update and delete by ourself, this I leave for reader’s understanding capabilities, below are the screens for Update and Delete.
Edit Code:
Get:

Post:
Get Action View of Edit:

Edited few fields:

Update reflected in database:

Code to show details of a particular user :

Details Screen:

Note : Details Action do not have POST one, as nothing to post to controller.
Likewise for Delete:
Screen:

Back to List after Delete:

In database after delete:


Yes, all the CRUD operations done.Now we know MVC.
There are few basic scenarios that I want to discuss before finishing with the First Part, like passing data from Controller to Views, between Controllers etc and about Model validation.
5. Understand ViewData, ViewBag and TempData.
I wanted to take this topic as there is much confusion regarding these three players.

MVC provides us ViewData, VieBag and TempData for passing data from controller, view and in next requests as well. ViewData and ViewBag are similar to some extent but TempData performs additional roles. Lets get key points on these three players:
ViewBag & ViewData :
I have written sample test code in the same application which we are following from the beginning,
– Populate ViewData and ViewBag on Index action of My Controller,

– Code in View to fetch ViewData/ViewBag,

– When run the application, we get on screen,

Following are roles and similarities between ViewData and ViewBag:
Ø Maintains data when move from controller to view.
Ø Passes data from controller to respective view.
Ø Their value becomes null when any redirection occurs , because their role is to provide a way to communicate between controllers and views. It’s a communication mechanism within the server call.
Differences between ViewData and ViewBag (taken from a blog):
Ø ViewData is a dictionary of objects that is derived from ViewDataDictionary class and accessible using strings as keys.
Ø ViewBag is a dynamic property that takes advantage of the new dynamic features in C# 4.0.
Ø ViewData requires typecasting for complex data type and check for null values to avoid error.
Ø ViewBag doesn’t require typecasting for complex data type.
TempData:
TempData is a dictionary derived from TempDataDictionary class and stored in short lives session.It is a string key and object value.
It keep the information for the time of an HTTP Request. This mean only from one page to another. Helps to maintain data when we move from one controller to other controller or from one action to other action. In other words when we redirect, “Tempdata” helps to maintain data between those redirects. It internally uses session variables. Temp data use during the current and subsequent request only means it is use when we are sure that next request will be redirecting to next view. It requires typecasting for complex data type and check for null values to avoid error. Generally it is used to store only one time messages like error messages, validation messages.
I added a TempData in Edit Action as,
[HttpPost]
public ActionResultEdit(int? id, UseruserDetails)
{
TempData[“TempData Name”] = “Akhil”;
…..
And when View redirected to Index Action,

i.e. I get the TempData value across Actions.
6.Model Validation:
We can have many methods for implementing validation in our Web Application Client Side, Server Side etc…
But MVC provides us a feature with which we can annotate our Model for validation by writing just one/two line of code.
Go to the Model class User.cs, add [Required(ErrorMessage = “FirstName is required”)] on the top of FirstName property as,
public int UserId { get; set; }
[Required(ErrorMessage = “FirstName is required”)]
public stringFirstName { get; set; }
public stringLastName { get; set; }
………..
Now when we run the application, and try to Edit/Create user without specifying FirstName, we get,
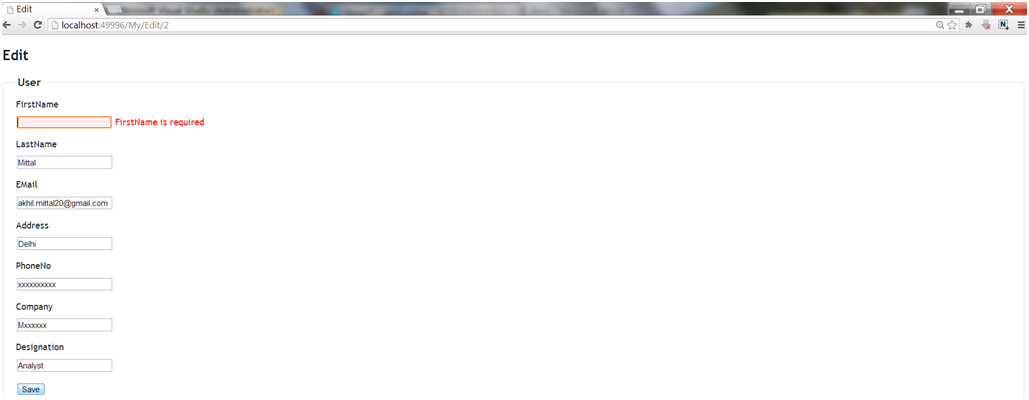
Surprised!, Yes model validates itself with these annotations, there are many more validators like required field one that I used.
Do not forget to include usingSystem.ComponentModel.DataAnnotations; Namespace, when using Model Validation.This is the namespace that holds classes used for validation.
Conclusion:
 Now we know what MVC is ,how to Implement it,its advantages,CRUD operations in MVC.Upcoming parts of the tutorial will be focussing on more advanced topics like EntityFramework, Repository Pattern,Unit Of Work Pattern.Code First Approach.
Happy Coding J.
Read more:
- C# and ASP.NET Questions (All in one)
- MVC Interview Questions
- C# and ASP.NET Interview Questions and Answers
- Web Services and Windows Services Interview Questions
Other Series
My other series of articles:
For more informative articles visit my Blog.
For more technical articles you can reach out to CodeTeddy.

4 comments